Showing posts with label Mechanics. Show all posts

Speedometer Design

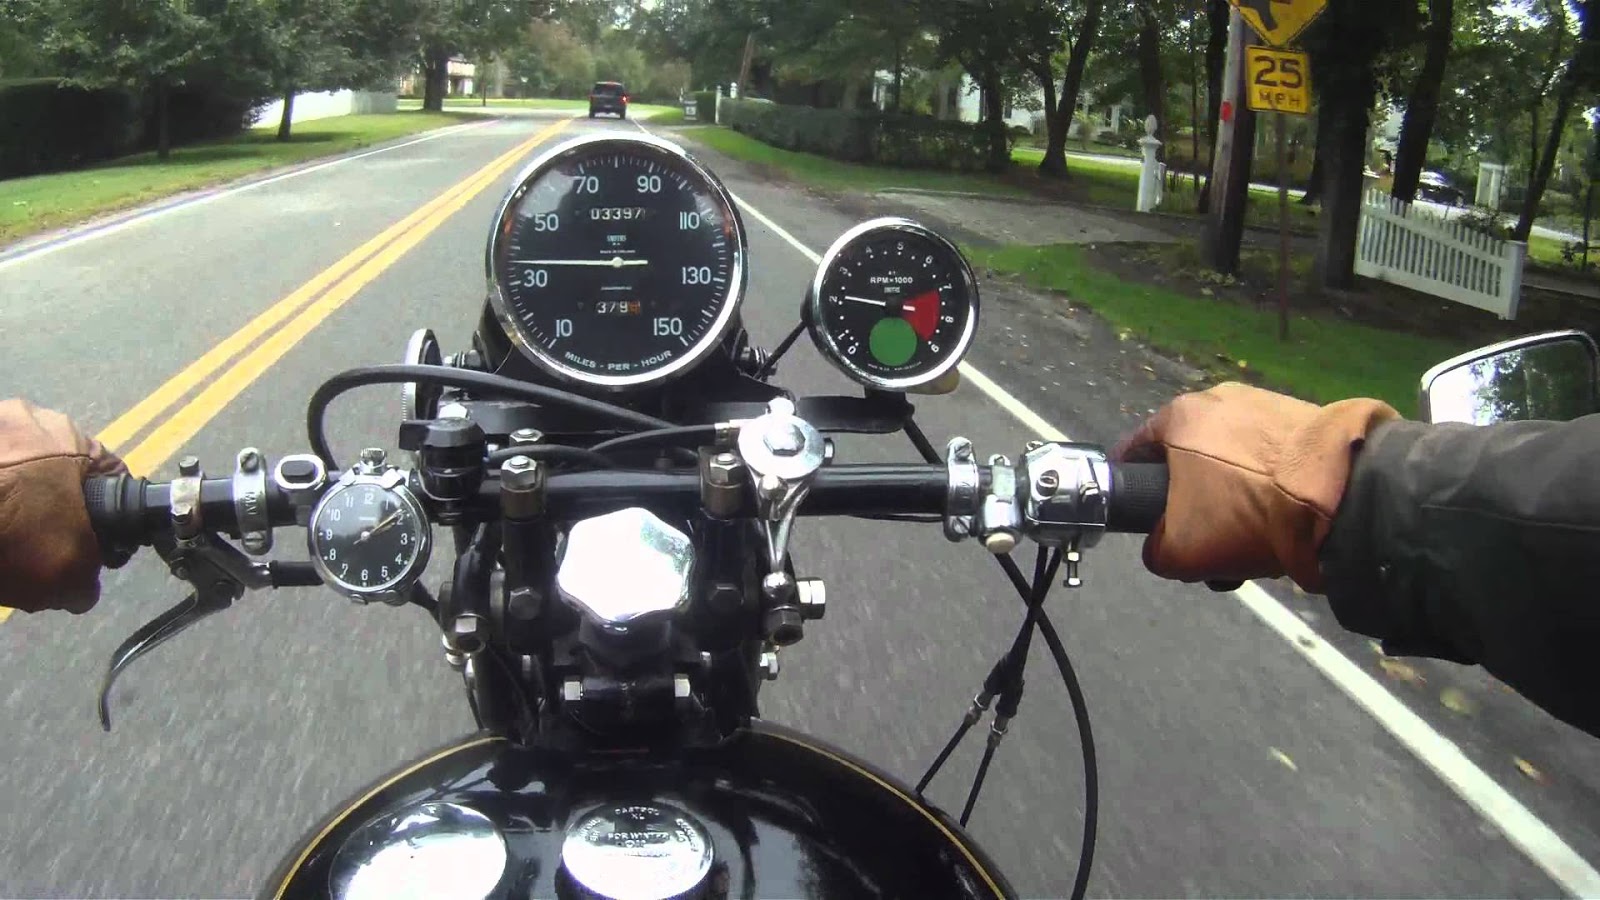
Some wonderful speedometers, gauges, and watches from the last 100 years:


Two designs for a new Janus speedometer from our own senior lead speedometer designer, Grant Longenbaugh:

The rectangle at the bottom is for a digital odometer, trip meter, volt meter, and temperature guage.


Winter KLR 650 Maintenance & Upgrades

It's the dead of winter here in northern Indiana and I have a couple of task that needing attending to on the old KLR as well as a few upgrades that I have been collecting parts for over the past few months. If you get a part here and a part there and can manage to be patient, winter updates and repairs don't have to be that painful. Of course right when I start all this it's going to break into a beautiful winter thaw, but this really shouldn't take all that long anyway. 

First up, the speedometer went out on me last spring in the thick of some off-trail brush up on the MCCCT and I have been meaning to get that repaired all summer (I guess there are a few more miles on the bike than the odometer claims...). Next, the steering has been feeling a little funny since I got the bike and I have often wondered if the steering head bearings aren't going out. More on that later. Lastly for the maintenance and repairs, I noticed the last time I put tires on the bike (Kenda 244's, which I have been very happy with) I noticed that the brake pads were getting a bit low. I will go ahead and replace those.

Apart from these repairs and maintenance issues, I have a couple of upgrades I want to make to the bike. First up, the suspension: stock KLR suspension is very, very basic. I won't say it's not usable, because I and plenty of other riders all over the world have ridden with it for years, sometimes in incredible terrain. I will also acknowledge that KLR suspension probably wasn't designed for a 6'-6" 250lb rider carrying gear. However, during the last year's and this spring's trips up to the MCCCT and doing a bit more off-road riding, the suspension really demonstrated its failings. Whooped out sections of the trail required slowing waaay down and still bottoming out at the bottom with a wild swaying and bucking gate that instantly let me know that the whole bike was laboring on each and every up and down. This in turn meant that the tires where either not getting enough traction, or biting deep into the sand only when the bike was completely bottomed out and off balance. The rear suspension was much the same on the trail, but showed its unsuitedness to my weight and riding style more around town. I'm a big rider and when my wife's weight was added to mine it made the bike squat way down and handle terribly even with the preload all the way up. I should also mention that the front suspensions light spring rate is a detriment on the road and around town since it wants to dive excessively under braking loads. 

These are all common KLR owner complaints and luckily for me they have been solved with a multitude of upgrades options for the suspension (as with just about everything else with the KLR). While I do ride off-road and will doubtless appreciate a better suspension set-up, I am not an off-road racer or anything of the sort. I just want to make the suspension a bit stiffer, quicker, and allow for my weight. In the spirit of KLRing, I'm also not interested in spending a fortune on state-of-the-art equipment. If I was, I wouldn't have a KLR. So, that means I'm not opting for aftermarket shock absorbers or forks. Rather, I am going to take mine apart and rebuild them with a selection of the many upgrade parts that are available for the KLR owner. First off, I want those forks to behave a bit better. The tried-and-true upgrade here is the Progressive (yep, it's right in the name) fork spring conversion. You take out the stock springs and spacers, replace them with the progressive units, maybe up your oil weight a bit, and blammo, you've got far, far better front suspension than the stock KLR. Notice I didn't say great or competitive, because it's not. It's still an ancient, out-of-date, damper tube suspension system, but it will have plenty more preload with the new spacers, and most importantly, a progressive spring rate. I'll see how I like it and maybe down the road I'll get emulators or intiminators to give even better compression and rebound damping, but for now I'm just looking forward to the better preload, stiffer, faster ride, and the lack of wallowing dive. Oh, I think I'm also going to push those fork tubes back down to the stock position and gain myself another 1" of ride height, as one of the previous owners had lowered the front end (I have heard the lowered front end can result in better handling so I will try this with caution). 

At the back I am replacing the stock monoshock spring with a new unit from Top Gun that is rated for up to 300lbs. I'm not all that heavy, but I do often ride with gear and love to zip downtown with my wife, so I decided to go for the heavier spring. We'll see how that goes. While I have the shock out, I plan to rebuild the shock, replacing the damper head with a new aftermarket part and changing the oil. It is possible to rebuild the stock head, but it requires bending out some seal retainers and looks like it will cost around the same for the replacement seals as a new head so I opted for the later.

The next upgrade is the front brake. The brakes on the KLR are nothing to write home about. I have been in several experiences with both deer and cars where my braking was not the thing that prevented me going down. They stop the bike, but with the mushy front end they don't do it very fast. So, I decided to invest in a new 270mm wavy front rotor. I am going to continue to use the stock caliper and simply upgrade the brake pads (they're wearing out and I'll need a new even surface to mate up with the brand new rotor. To make all this work, I got a billet aluminum brake caliper extender arm which should make the install of this upgrade fairly easy. We'll see how it goes and if I'm still not happy, maybe will upgrade to a double piston caliper at some point.  

Lastly, the steering head bearings. I'm kind of dreading this one as it requires quite a bit of disassembly, but really I'm sure that won't take long. I have removed quite a few bearing races from steering heads, and that can be quite frustrating though. I've got the new bearings in and I'll see if I can't isolate that headset shake I think I've been feeling and maybe fix it just by tightening top the adjuster nuts... (although given the age of the bike I'd say it's more likely that that isn't going to solve the problem). Either way, I'll solve that when I get to it.

And without further ado, here is the basic process of making these upgrades and performing the maintenance in as simple a manner as I can devise. I often under-plan these things so I thought it would be better to write it out first and see if I could figure out where I would get stuck before I got there... If it all works out as I plan, I hope to post some pictures of the process soon. Barely any of these upgrades will be the kind you can see and show off, rather they will be the kind that you are thankful for and can gloat over while you are enjoying the ride.

Front Suspension Upgrade
  1. Jack up front of bike
  2. Remove front wheel
  3. Remove brake caliper 
  4. Clean brake caliper and install new brake pads
  5. Remove brake rotor from wheel
  6. Install new brake rotor on wheel
  7. Test forks for steering head bearing failure (see #11)
  8. Loosen fork caps
  9. Loosen fork triple tree clamps
  10. Remove fork legs
  11. If replacing steering head bearings, now’s the time...
  12. Remove fork caps
  13. Remove stock spacers, washers, and springs
  14. Drain oil
  15. Flush with new fork oil
  16. Reinstall fork legs (flush with top plate)
  17. Add 15W fork oil w/fork legs compressed
  18. Pump up and down several times
  19. Install new fork springs, washers, and PVC spacers (cut to length)
  20. Replace fork caps (torque as per manual)
  21. Install new brake caliper extender
  22. Reinstall brake caliper on new extender
  23. Reinstall wheel
  24. Install new speedometer drive
  25. Let front of bike down and test new suspension

Rear Suspension Upgrade
  1. Jack up rear of bike
  2. Remove rear shock
  3. Thoroughly clean shock
  4. Remove stock shock spring
  5. Open up shock and remove stock plunger head
  6. Replace with aftermarket head 
  7. Refill with 15W shock oil
  8. Put shock back together
  9. Install new shock spring
  10. Refill shock with nitrogen
  11. Reinstall shock
  12. Replace rear brake pads
  13. Replace rear wheel
  14. Test it all out...

Steering Head Bearings


  1. Remove front fairing
  2. Remove wiring from speedometer cluster marking carefully
  3. Remove speedometer cluster
  4. Remove handlebars and set back on tank
  5. Remove top plate nut
  6. Remove top plate
  7. Loosen and remove adjuster nuts 
  8. Remove steering stem from steering head and set aside
  9. Tap out headset bearing races (prepare to exert high levels of patience)
  10. Clip off lower bearing cage and attempt to tap off lower bearing inner race
  11. If this doesn’t work, cut it off with a dremel very carefully
  12. Pack new bearings with grease
  13. Cut an opening in the side of the old bearing races
  14. Tap in the new bearing races to the headset with the old bearing races turned upside down
  15. Install lower bearing inner race on steering stem
  16. Reinstall steering stem in headset
  17. Tighten adjuster nuts
  18. Reinstall top plate
  19. Reinstall top plate nut and torque down
  20. Test fork bearing tension and adjust accordingly
  21. Reinstall handlebars
  22. Reinstall speedometer cluster
  23. Reconnect wiring according to marks
  24. Replace front fairing

Janus Design Updates

Here are two recent video updates showing the typical design process for developing a new Janus part. In this case, the part is an upgrade for our most recent model, the Griffin 250, a dual-sport style motorcycle in the tradition of the early "scrambler" style motorcycle. Scramblers were the first motorcycles built specifically for riding off-road and were the forebearers of today's dedicated dirt bikes. This component protects the frame rails and engine cases from debris and obstacles with could dent or otherwise damage the motorcycle in off-road riding conditions.


The Paragon...

Here is a sneak preview of what I was doing in the few moments I wasn't working on my thesis this semester. MLM's Devin Biek and I have set out to design and build a custom moped frame from the 19" wheels and swing-arm up to the polished aluminum tank and seat. Oh, and the pedal shaft... Our inspiration comes from 60's & 70's 50cc GP racers with a flavour of 20's and 30's record breakers. Don't mind those EBR's they're just on there for the mock up. More to come in good time...

Design Precedents:
Early Triumph racers
'65 Honda 50cc GP racer
The 1937 Excelsior "Manxman"
Italian 50cc racers

The famous supercharged Zenith "Super Kim"
60's Minarelli 50cc GP racer
Ivan Wicksteed's Brooklands record breaking supercharged Triumph Speed Twin

60's & 70's GP racers
Harley Davidson board track racers

I love this shot. And those handlebars...


Variator Tuning

As I described earlier, the Shanghai Shuttle can't quite hit the power band of the new pipe. This is because the variator is opening too quickly, making the gear ratio too tall to allow the bike to get into the pipe's power band. In order for the bike to hit the power band in the highest gear ratio of the variator, the variator must gradually open throughout the range of the power band.


A variator works on the principal of centrifugal force. As the rpm of the crank (and thereby the variator) increase, three weights (in a Honda Hobbit) are forced apart on ramps which in turn force the variator to close. As the variator closes, the belt running between the two angled plates is forced further out on the pulley. This changes the gearing of the bike from short to tall, or from low to high.

The picture on the right shows the variator in the closed position during high rpms. Notice how the rear variator, described in the picture as the "driven pulley," is open. This variator does not contain weights but rather a spring which is tuned to take up the slack of the front variator or "drive pulley". The benefit of a variator is that you essentially have an infinite number of gears between low and high gear which means, on a well tuned bike, maximum torque throughout; from low to high end.

However, if a) the variator closes too quickly the bike will drop out of the power band and be unable to reach maximum rpms, or b) the variator changes too slowly the power band can only take place within a limited range of the variator, meaning that you could top out well below your top gear.

The solution to this is to tune the variator to close later by lightening the weights in the front variator or by putting a stronger spring in the rear variator. If done correctly not only will you shift later, but the shift or variation will occur over a much wider range. Today I started by lightening the weights. There are three weights in a Hobbit variator. I weighed each of them on a triple beam and the average was about 14.8 grams. I found a drill bit that looked about right and drilled out the center of each weight taking off approximately 5 grams. 

The disassembled variator with a weight on the scale.


Drilling out the weight

A comparison of the weights before and after lightening.

With the freshly tuned variator back on the bike there was a noticeable difference. The variator opened much more gradually and wound up into the beginning of the power band at around 35 mph, but once again, shifted too soon to carry the bike through the variator while in the power band. As the picture above shows, there isn't enough material to take out any more weight. The next option is to either find lighter aftermarket weights, or even better, to find a stiffer rear variator spring to keep the variator from closing so soon. The good news is that there was a definite improvement, and there is plenty of room for more modification. Upgrading to a larger and more tunable carb will also really help. I took the bike out today for a trial run, and even without hitting the power band I was able to make high forties. On the downhills I could get into the power band and that was fun. It will be interesting to see how this Cali pipe performs on a variated bike once it's dialed in.

Variator images courtesy Just Gotta Scoot.

MLM Performance Exhaust

I made a post earlier about MLM performance expansion chamber exhausts, and another about how they work. I just got mine back from the welder last night (our welder apparently does pretty good work even after 12 beers) and bolted it up. My variator is opening way too soon for the bike to hit the pipe's power band and it feels like I am running a bit rich. I will either drill out the variator weights I have, or get some lighter ones so that the variator will open at more like thirty or thirty-five miles an hour and not fifteen or twenty like it is now. Nonetheless, I can feel the pipe wanting to hit the power band; it just doesn't have the rpm's. I have more pictures of the details such as the header flange I fabricated and the rear hanger, but in the meantime, here are some pictures of the basic process:
 
Pieces of laser-cut 18 gauge steel ready to be rolled into the cones of the "Cali" and "RevRun" pipes.

Devin can usually get about fifty cones out of a single sheet of steel. When we get the stacks of oddly shaped steel back we take them to various conical jigs made of either maple or steel, depending on the curvature and tightness of the cone, and basically beat them into shape with rubber mallets. It took me about a week to finally begin to understand how the metal would react to the impact and where exactly to direct the force of the blow.

The rolled cones ready for welding.

 After the cones are rolled we send them off to the welder who welds the ends together. Then we take them back to the jigs and true them up to fit together perfectly and then tack-weld them together creating the basic form of the exhaust. At this point they are nothing more than five variously shaped cones tacked together.

 
What happens if your hit your hand and not the sheet metal when rolling the cones...

 Then it is back off to the welder for the whole pipe to be welded up. When we get it back we then mock it up to a bike (in this case a Honda Hobbit) making sure that the header clears the center-stand and provides a clear flow of gases from the cylinder through the chamber. We also tack the hanger and perforated tube in the appropriate position. Then it goes back to the welder again.

 Here is the pipe getting the rear hanger, header flange, and silencer  welded in place.

 Jim, the welder TIG welding my pipe while smoking a cigar after a twelve pack of Mich Lite. 

He warned me that his welding might not be up to par, but I told him I had complete faith in his abilities (which I do) and he didn't let me down.

Here is my old stock exhaust. It is the little box down there under the magneto.

 And here is the bike with the new pipe...
I have yet to see how and where the pipe hits the power band, but the sound of the pipe is amazing. It is surprisingly quiet; barely louder at idle than the super-silent stock exhaust, but when you open it up it really sounds good, with a wonderful purr when you let off the gas. The bike is already going a bit faster than stock, even without hitting the power band. The pipe should clear the side cover once I work with it a bit. More updates to follow...

Hobbit Performance Exhaust

Just got finished mocking up one of the MLM "Cali" pipes I built with Devin to my Honda Hobbit yesterday. I fashioned my own header flange (who needs machinists anyway?) and figured out a rather ingenious rear hanger supported of the bottom of the sub-frame. Pictures to follow. 

In the meantime here she is:

Since this photograph was taken I have mounted the old headlight off my Puchavus to the front forks, installed a different carb and purchased the 21mm intake for the bigger 21mm PHBG I will be getting to go along with the new pipe.  Lets just hope the Chinese clone bottom end I'm running holds out...

Velocity Stacks and Garden Tractors

I experienced the unexpected thrill this weekend of a garden tractor pull in Shipshewana, heart of Indiana Amish country. While there were of course no Amish entrants in the event, the gray-hatted boys seemed quite interested, gathering around the machines as they prepared for their run in front of the adjustable weight.

Thrill might be a bit of an exaggeration; tractor pulls in general usually attract a very specific audience... That said, large tractor pulls are certainly a bit more exciting with a lot more power accompanied by massive wheelies, but my appreciation of small engine tuning was well rewarded with velocity stacks galore, massive carburators, and homemade exhaust systems--even if they were all four-stroke.

 
While most of the smaller tractors retained there starters, all of the more powerful machines required this interesting dolly mounted starter. Since tractor engines are longitudinally mounted this device was simply wheeled up next to the tractor and a belt run from the electric motor mounted at the top of the dolly. The car battery at the foot of the dolly kicks over the started and the tractor fires to life, while the belt slips harmlessly off.